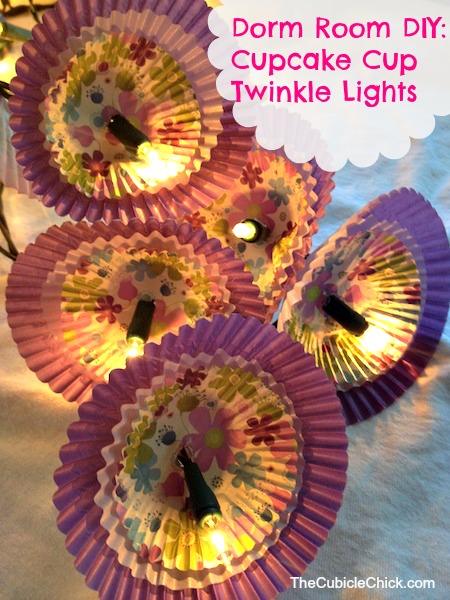
Twinkle lights can add some fun charm and whimsy to a room. A recent browse at a local retail store however showed that decorative twinkle lights can run as much $15 a strand, which can be a little steep if you are on a back to school budget. Instead, why not make your own decorative twinkle lights? These Cupcake Cup Twinkle Lights are the perfect craft for you to try if you want a cute and decorative look on a dime. Plus, they are fun to make and even the kids will enjoy getting in on the action. You only need a few supplies from your local dollar store, so take a look and see how easy it is to make your own!
Dorm Room DIY :Cupcake Cup Twinkle Lights:
Supplies Needed:
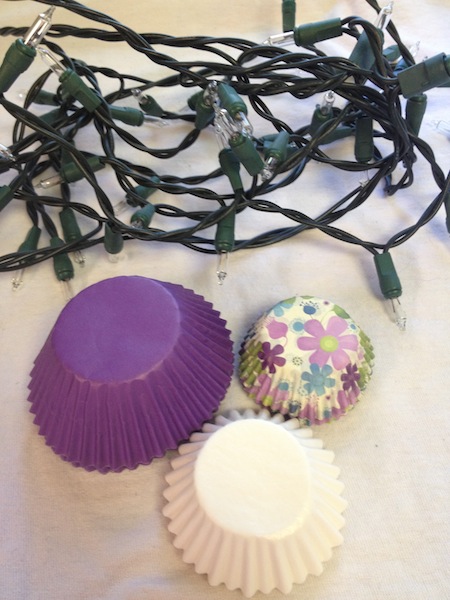
*2 packages of cupcake cups. You will want to find two different sizes, so that one smaller cup will fit inside the larger cup. Look for fun and decorative prints and colors, many of which can be found at your local dollar store.
*1 strand (or more if you want) of twinkle lights. You can find these at your local dollar store as well or your local retail store for just a few dollars per strand. LED ones are nice since they don’t give off much heat and are safe to use with the paper cups. If not using LED ones, just test your strand first by plugging it in for one hour and making it sure it does not get too hot.
* Scissors
* Glue stick
That’s it! When is the last time you crafted something using just four supplies? As you can see this one is so easy and the perfect weekend activity.
Directions:
1. Take your large cupcake cup and scissors. Using your scissors, create a scalloped edge on each cup. You can do this free hand. Just trim each cup in a curved fashion so it resembles flower petals.
2. Repeat with your second, smaller cup if you wish. Or, you can leave this cup as is. Cupcake cups typically have some natural scalloping so if you choose to leave it, it will still look quite decorative.
3. Next, add a small dab of glue to the back of your small cupcake cup. Press it firmly into the larger cup and hold into place. You will see your blossom take shape. NOTE that in our sample picture, we turned our large cupcake cup inside out first before doing this. That way, the pattern was more obvious. It is up to you whether you want to do this or not.
4. Once you cups are pressed into place and dry, take your twinkle lights and open them up into a long strand.
5. Take a pencil tip and poke a hole in the center of each of your cups.
6. Now, poke each mini light bulb through the paper cupcake cup. You don’t want the hole to be too big, as you want the cup to fit snuggly over the light bulb.
7. Once all of your bulbs are covered, you are all done!
Now, just plug your strand it. You can use Command hooks if you wish to hang it on your walls or bordering your ceiling. These lights are so colorful, so whimsical, and so fun to not only display but to make as well.
Give these Cupcake Cup Twinkle Lights a try and see how easy it is to get this look for very little!
Written By Katie Femia, DIY & Craft Contributor


Leave a Reply